1. Getting started
Create a new board
- On the top page, click Create a new board.
- Your board is created instantly and a shareable URL is generated.
- You can rename the board and add members later in Settings.
Join a shared board
- Open the shared URL.
- Some boards open immediately.
- If you see a login screen, sign in using the registered email and password.
Before joining, check:
- Is the URL complete (not truncated)?
- Does the board require login?
- Is your email registered as a member/assignee?

Switching the board language
- Use the `EN` / `JP` button at the top-right of the board to switch between Japanese and English.
- On desktop, the button appears in the header area. On mobile, it appears near the top menu area.
- When you switch languages, column labels, buttons, and settings text update to the selected language.


2. Understanding the screen
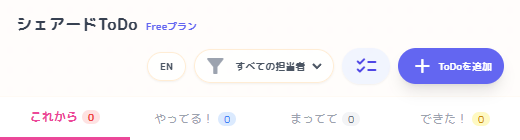
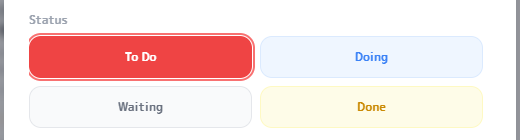
Tasks are shown in 4 columns: To Do, Doing, Waiting, and Done.
On desktop, it’s a kanban board. On mobile, it’s a tab-based view. Task cards can show title, priority, assignee, category, and due dates.
Archive (the box icon near Done) stores tasks you want to remove from the main board but keep for later.
- Near-due tasks stand out visually.
- Tap a task to open details.
- Desktop supports drag & drop.
- The box icon near Done opens Archive.


Switching between Japanese and English
- The desktop header image shows the top area with board and user information.
- The mobile header image shows the compact top layout used on phones.
- The mobile menu image shows the navigation panel you can open on small screens.
- Use the `English` / `日本語` button at the top-right of the manual page to switch languages.
3. Add a task
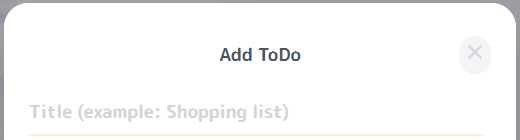
- Click Add ToDo.
- Enter a title.
- Optionally set status, priority, assignee, category, notes, due date, and final deadline.
- Click Save.
Main fields
- Title: what needs to be done
- Priority: higher priorities stand out
- Assignee: who owns it
- Due date: normal deadline
- Final deadline: non-movable deadline
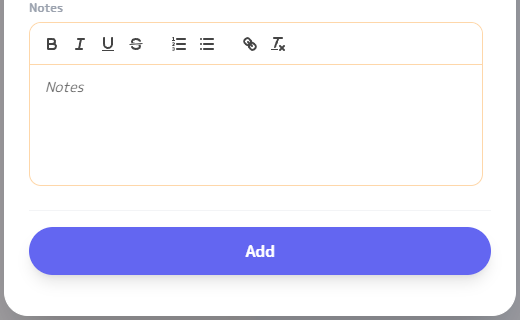
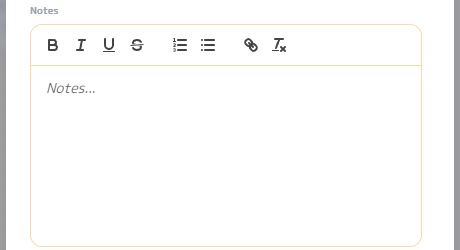
Rich notes (WYSIWYG)
Use rich formatting to write clear instructions: bold, lists, steps, links, etc. Categories help you organize tasks by project/topic.
Priorities (6 levels)
Choose from 6 priority levels to match urgency.


4. View & edit tasks
View a task
- Tap/click a task.
- Check notes, dates, and comments.
Edit a task
- Open edit.
- Change only what you need.
- Click Save.
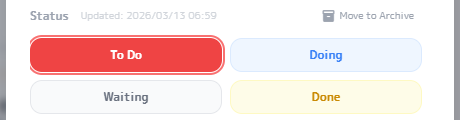
Change status quickly
Switch between To Do / Doing / Waiting / Done from the status buttons. On desktop, you can also drag tasks between columns.

Desktop
Desktop: Drag & drop to move a task across columns.
Mobile
Mobile: Swipe left/right to switch tabs (columns).
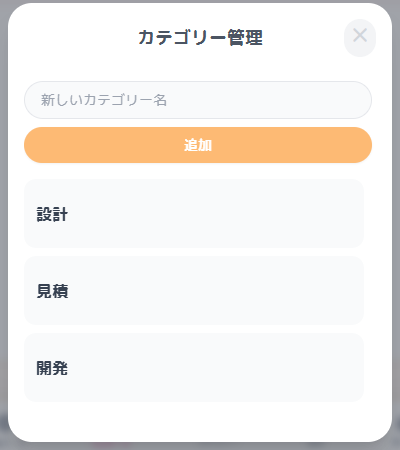
5. Category management
Categories help you organize ToDos by project, workflow stage, team, or any other grouping that fits your work. Setting them up first makes both adding and editing tasks easier.
What you can do
- Add labels for projects, phases, or teams.
- Clean up categories you no longer use.
- Make category selection easier when adding or editing ToDos.
How to open it
- Open Settings from the lower-left corner.
- Open Category Management.
- Add, edit, or organize the names you need.
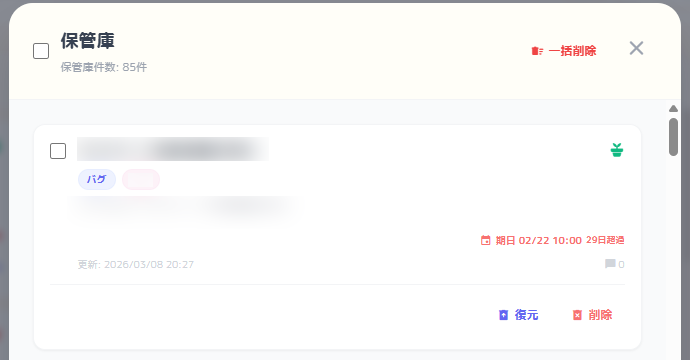
6. Done / archive / delete
Mark as done
Move the task to Done (edit screen or drag & drop).
Archive
Archive tasks you don’t need in the main board. You can restore them later.
Delete (permanent)
Deleted tasks cannot be restored. Archive first if you’re unsure.
8. Admin-only ToDo management
In Shared ToDo, anyone who can use the board can normally create ToDos.
When "Admin-only ToDo management" is enabled, admins can operate as usual, and assignees can only change the status of ToDos assigned to themselves and add comments.
How to enable
Only admins can change the "Admin-only ToDo management" setting in Settings.
To use this setting, assignees must be able to log in, so registering an email address and password in advance and completing email verification are required.
On the Free plan, this setting can be enabled for only one board per admin email address.
How assignees use it
Assignees who have a registered email address and password can log in and work only on the ToDos assigned to themselves.

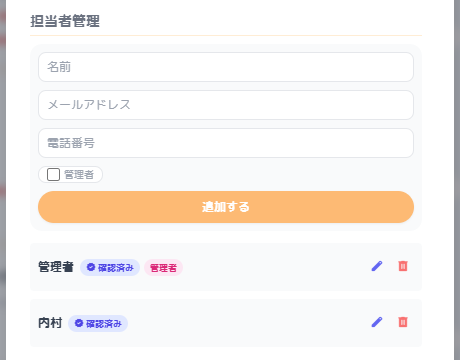
9. Settings & sharing
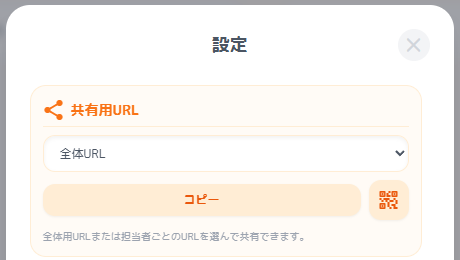
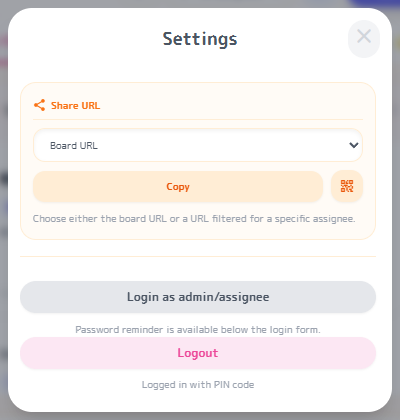
You can do in Settings
- Rename board
- Manage members/assignees
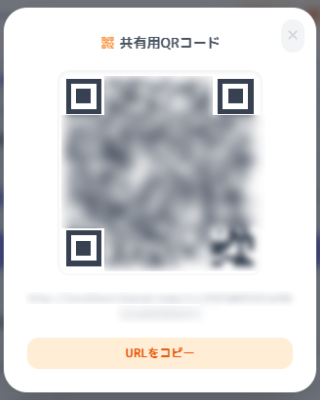
- Choose a board-wide URL or an assignee-specific URL, then copy it or show a QR code
Share a board
- In Settings, choose either the board-wide URL or a URL filtered for one assignee.
- When someone opens an assignee-specific URL, the board opens with only that assignee's ToDos shown.
- Copy the selected URL or open the QR code for that target.
- Anyone with the selected link can join unless the board is private.
Receive email reports
- Add an email address in Settings → Member management.
- Complete email verification from the confirmation email.
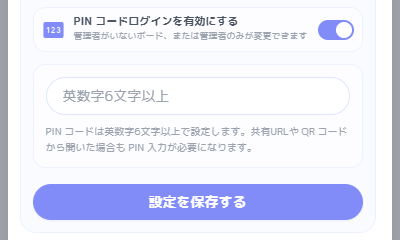

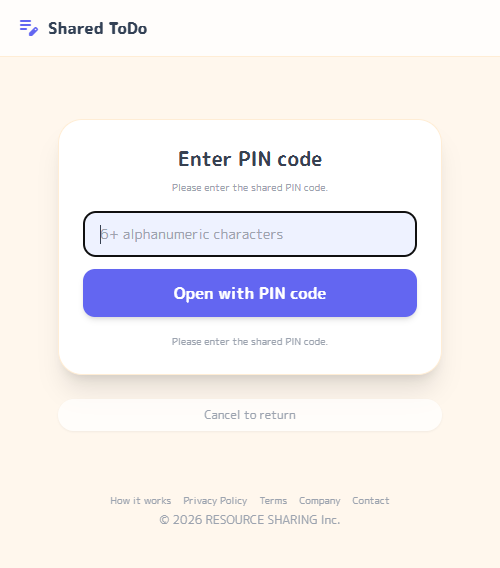
10. PIN Login
What PIN Login does
- Only people who know the shared PIN can open the board.
- Knowing the URL or QR code alone is not enough.
- It is separate from member/admin email and password login.
Setup notes
- Enable `PIN Login` in Settings and set an alphanumeric PIN with 6 or more characters.
- `Require login` and `PIN Login` cannot be enabled at the same time.
- If the board has no admin yet, you can still change the board name and PIN settings after entering via PIN.
How it differs from regular login
PIN Login is a shared login used only to open the board. Actions that require admin privileges, or actions that require you to be logged in as an assignee, still use the regular email and password login. Entering with a PIN alone does not mean you are logged in as an admin or assignee.
11. Login & password reset
Login is used when entering a members-only board, and when admins or assignees need to change settings.
You can check the conditions for "Require login" and the difference from PIN Login on the Paid Plan Features page.
When entering a members-only board
- Open the board URL.
- When the login screen opens, enter your email address and password.
- Click "Login".
When logging in to change settings
- Open the board URL.
- Click the gear icon in the lower-left corner to open Settings.
- Click "Login".
- When the login screen opens, enter your email address and password.
- Click "Login".
When logging in to change settings after PIN code login
- Open the board URL.
- When the PIN code login screen opens, enter your email address and password.
- Click "Login".
- Click the gear icon in the lower-left corner to open Settings.
- Click "Login as admin / assignee".
- When the login screen opens, enter your email address and password.
- Click "Login".
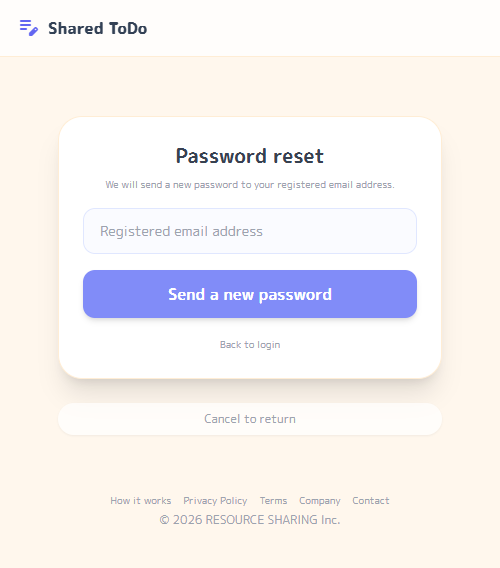
If you forgot your password
- Open the board URL.
- Click the gear icon in the lower-left corner to open Settings.
- Click "Login".
- When the password resend screen opens, enter your registered email address.
- Click "Send a new password".
12. Safety, board suspension & deletion
Inappropriate language is automatically blocked, so the service is safer to use even when boards are shared by URL.
24/7 moderation for safer use
ToDo titles, detailed notes, and comments are checked automatically. Depending on the content, saving may be blocked before it is completed.
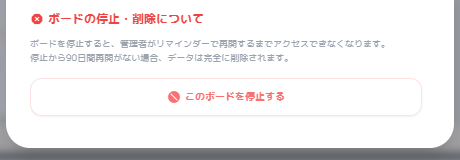
Board suspension
Boards may be suspended when policy violations are suspected, when they have not been used for a long time, or when there are operational issues.
Account deletion
If an assignee account is deleted, that account can no longer log in. Contact the admin if the account needs to be registered again.
Tips for using it safely
- Do not enter content related to crimes, harassment, or spam.
- Depending on the text you enter, saving may be blocked before completion.
- If admin review is required, the review history may be checked.
13. FAQ
Q. How many boards can I create?
On the Free plan, you can create any number of boards. However, if you register as an admin with an email address, the same email address can be set as admin on up to 5 boards.
Q. There is no board.
Even if you create a new board, your My Board will be deleted automatically if you do not create a ToDo or category, set the board name, or assign an admin or assignee within 30 minutes. If you want to keep using the board, first create a ToDo or category, set the board name, or assign an admin or assignee.
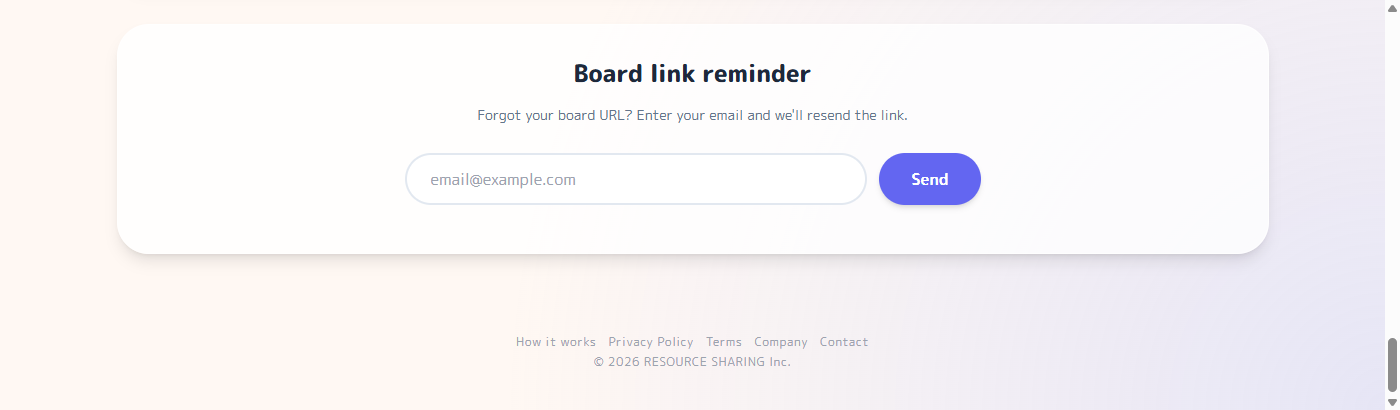
Q. What should I do if I forgot the URL?
You can reissue it from the top page using the My Board reminder.
Q. I can't log in.
Check your email address, password, and verification status. If there are too many failed attempts in a short time, login may be temporarily restricted.
Q. Sometimes I can't save.
Depending on the text you enter, saving may be blocked for safety reasons. Try changing the wording slightly and try again.
Q. Can I restore deleted tasks?
No. Permanently deleted tasks cannot be restored. Archive them first if you are unsure.
14. Paid Plan Features
This page explains the basic operation flow. Plan-only features and limit differences are summarized on the dedicated Paid Plan Features page.
- Limit differences by plan
- Email report differences
- Watcher functionality
- The "Require login" feature
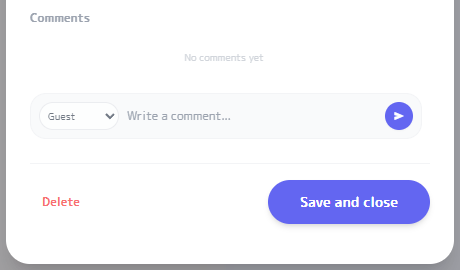
7. Comments
Comments